What Are the Steps to Cooking a BBQ? A Beginner’s Guide
Welcome to the world of BBQ, where the flavors of smoked, grilled, and charred meats and vegetables create unforgettable meals. Whether you’re standing in front of a brand-new grill or looking to master the art of BBQ for the first time, this guide is designed to walk you through the essential steps of cooking a BBQ, from preparation to serving. Let’s fire up those grills and get started!

Prepare: Setting the Stage for the Perfect BBQ
Preparing your grill and meats correctly is foundational to cooking a BBQ. Each type of grill and kind of meat requires specific attention to detail to ensure optimal flavor and cooking conditions. Let’s delve into the preparations necessary for charcoal, gas, and smoker grills, as well as the best ways to prepare pork, chicken, beef, and fish.
Preparing your Grill
Charcoal Grill Preparation
- Cleanliness: Start with a clean grill. Remove ash and residue from previous sessions to improve airflow and temperature control.
- Fuel: Choose high-quality charcoal. Lump charcoal burns hotter and faster, while briquettes offer a more consistent and longer burn.
- Ventilation: Understand your grill’s ventilation system. Adjusting the vents controls the heat. Open vents mean hotter and faster burns, while closed vents will lower the temperature.

Gas Grill Preparation
- Check Connections: Ensure all gas connections are tight and leak-free. Use soapy water to check for bubbles along the hoses and connections.
- Clean Burners: Make sure the burners are clean and unobstructed to promote an even cooking temperature.
- Fuel Level: Check your propane tank to ensure you have enough gas for your cooking session. Running out mid-BBQ is a scenario best avoided.
Smoker Preparation
- Fuel Choice: Select the right wood for your smoke. Different woods impart different flavors. For example, hickory is great for pork, while applewood complements chicken and fish.
- Water Pan: Fill the water pan to help maintain temperature and add humidity to the smoking environment.
- Pre-Smoke: Allow your smoker to reach the desired temperature and produce smoke before adding your meat. This ensures a clean, consistent smoke flavor.

Preparing Your Meats
Pork
- Trimming: Trim excess fat to avoid flare-ups, leaving a thin layer for moisture and flavor.
- Brining/Marinating: Consider brining or marinating your pork to enhance tenderness and flavor, especially for thicker cuts like pork shoulder or ribs.
Chicken
- Pat Dry: Ensure the chicken is patted dry to help achieve a crispier skin.
- Seasoning: Apply a liberal amount of seasoning under the skin for more flavor. For whole chickens, consider a spice rub or butter mixture.
Beef
- Room Temperature: Allow the beef to come to room temperature before grilling to ensure even cooking.
- Seasoning: Season generously with salt and pepper. Beef’s robust flavor can handle strong seasonings, especially on thicker cuts like steaks and briskets.
Fish
- Skin-on: Grilling fish with the skin on helps hold it together and adds a crispy texture.
- Oil and Season: Lightly oiling the fish before seasoning can prevent sticking and help the seasoning adhere better.
Preparing your grill and meat with care is the first step to cooking a BBQ. Each grill type and meat has its nuances, but with the right preparation, you’re setting yourself up for a delicious and enjoyable BBQ experience. When cooking a BBQ, take the time to clean and check your grill, choose the right fuel, and prepare your meats with thoughtfulness to elevate your grilling game. Whether you’re a seasoned pro or a beginner, these preparations ensure your BBQ is off to a great start.
Preheat
Charcoal Grill Preheating
- Setup: Begin by cleaning out any old ashes from your grill, ensuring proper airflow. Next, stack your charcoal briquettes in a pyramid shape in the center of the grill to maximize heat concentration.
- Ignition: Use a chimney starter or lighter fluid to ignite the charcoal. If using a chimney starter, fill it with charcoal, place a fire starter or crumpled newspaper underneath, and light it. This method is safer and provides more consistent results than lighter fluid.
- Wait for the Coals: After lighting, wait for the coals to become ash-covered, which typically takes about 15-20 minutes. You’re looking for a consistent gray ash coating, signaling that the coals are at the right temperature for cooking.
- Spread the Coals: Once ready, spread the coals evenly across the grill for direct cooking or arrange them to one side for indirect cooking, depending on your recipe. Place the cooking grate over the coals and close the lid for 5 minutes to let it heat up.

Gas Grill Preheating
- Safety Check: Before anything else, ensure all connections between the gas tank and grill are secure to prevent leaks. Perform a quick check by applying soapy water to the connections and turning on the gas slightly to see if bubbles form, indicating a leak.
- Ignition: Open the lid to prevent gas buildup, then turn on the gas at the tank. Next, turn on one of the burners to high and ignite it using the grill’s ignition button. Once the first burner is lit, turn on the other burners as needed.
- Preheat the Grill: Close the lid and let the grill preheat for about 10-15 minutes. A preheat temperature of around 400-450°F is ideal for most cooking needs. This step is crucial for achieving those perfect grill marks and ensuring a non-stick surface.
Smoker Preheating
- Fuel Preparation: Depending on your smoker type (electric, charcoal, or wood), the preparation will vary. For charcoal smokers, fill the firebox with charcoal and light it as you would a charcoal grill. For wood smokers, select your wood chips or chunks based on the flavor profile you desire, and pre-soak them if recommended by your smoker’s manufacturer.
- Temperature and Smoke Control: Once your fuel is lit, adjust the vents to control the airflow and temperature. You’re aiming for a steady temperature within the smoking range, usually between 225-275°F, depending on what you’re cooking.
- Water Pan: Fill the smoker’s water pan (if it has one) to help regulate the temperature and add moisture to the cooking environment. This step is particularly important for long smoking sessions to prevent your food from drying out.
- Wait for the Smoke: Let your smoker reach the desired temperature and begin producing a steady stream of smoke. This indicates it’s ready for cooking. The preheat process for smokers can take a bit longer, up to 30-45 minutes, but patience here is key to achieving the perfect smoke flavor.

Preheating your grill, whether it’s a charcoal, gas, or smoker, is a critical step in the BBQ process. It ensures your grill reaches the ideal cooking temperature, helps prevent food from sticking, and contributes to achieving that delicious, smoky flavor BBQ is known for. Take your time with each step, and you’ll be rewarded with better tasting and more satisfying results.
Cook: Mastering the Art of BBQ for Each Type of Meat
Cooking on a BBQ is both an art and a science. Different meats require unique approaches to unlock their full potential. Here’s how to master the cooking process for pork, beef, chicken, and fish on your grill.
Pork
Pork’s versatility allows for a range of techniques depending on the cut:
- Pork Chops: Preheat your grill to a medium-high heat. Grill chops for about 4-7 minutes per side, depending on thickness. Look for an internal temperature of 145°F for a perfect balance of juiciness and safety.
- Ribs: Low and slow is the mantra for ribs. Set your grill for indirect heat at a low temperature, around 225-275°F. Cook ribs for 3-4 hours, wrapping them in foil halfway through the cooking time to retain moisture. Finish by unwrapping and placing them directly over the heat for a few minutes per side to caramelize the sauce.
- Pulled Pork (Shoulder/Boston Butt): For pulled pork, maintain a low temperature (225-275°F), using indirect heat. Expect a long cook time—up to 1.5 hours per pound. A well-cooked shoulder will reach an internal temperature of 195-205°F, at which point it should pull apart easily.
Beef
When cooking a BBQ, Beef’s rich flavors are enhanced by proper grilling techniques:
- Steaks: High heat is key for steaks. Preheat your grill to high, aiming for 450-500°F. Cooking times vary by thickness and desired doneness, ranging from 3-4 minutes per side for rare to 6-7 minutes for well-done on a 1-inch thick steak. Use a meat thermometer to ensure accuracy; 125°F for rare, 135°F for medium-rare, 145°F for medium, and 160°F for well-done.
- Burgers: Grill over medium-high heat, about 375-400°F. Cook for about 3-4 minutes per side for medium-rare and 5-6 minutes for well-done. Avoid pressing down on the burgers to keep them juicy.
- Brisket: Brisket thrives on slow cooking at low temperatures, similar to pork ribs. Prepare your grill for indirect heat at 225-250°F. A full brisket can take 12-20 hours, depending on size. Aim for an internal temperature of 195-205°F for tender, pull-apart meat.
Chicken
Chicken requires careful attention to avoid undercooking or drying out:
- Whole Chicken: Use indirect heat for a whole chicken, targeting 350-375°F. Cooking time varies by weight, but a rule of thumb is 15-20 minutes per pound. The chicken is done when its internal temperature reaches 165°F at the thickest part without touching bone.
- Breasts and Thighs: Preheat to a medium-high heat for direct grilling. Cook breasts for 6-8 minutes per side and thighs for 8-10 minutes per side, until the internal temperature reaches 165°F.
- Wings and Drumsticks: These can handle higher heat. Grill over direct medium-high heat, turning occasionally, until they’re crispy and reach an internal temperature of 165°F.
Fish
Fish cooks quickly and benefits from a gentle touch:
- Whole Fish: Grill over medium heat. A general guideline is to cook for about 8-10 minutes per inch of thickness, flipping once. The fish is done when it flakes easily with a fork.
- Fillets: Place skin-side down (if skin-on) over medium heat. Cooking time is typically 4-5 minutes per side, depending on thickness. Use a spatula for flipping to keep the fillet intact.
- Shellfish: Shrimp and scallops need high heat and quick cooking times—2-3 minutes per side for shrimp and 3-4 minutes per side for scallops.
Cooking meats on a BBQ involves understanding the unique needs of each type of meat—from the high heat sear for a perfect steak to the low and slow journey to tender pulled pork. Monitoring internal temperatures is crucial for both safety and achieving the desired doneness. With practice and patience, you’ll develop the skills to deliver delicious BBQ every time, no matter what’s on the menu.
Baste: Maximizing Flavor & Moisture
Basting is an art that, when done correctly, can turn good barbecue into great barbecue. It involves repeatedly applying liquid to the surface of the meat during cooking. This process keeps the meat moist, adds layers of flavor, and can contribute to a beautifully caramelized crust. Here’s how to refine your basting technique, including a more detailed look at bastes for specific meats and advanced tips for application.
Crafting the Perfect Baste
A great baste starts with understanding the flavor profile of the meat and how different ingredients in a baste can complement or enhance it. Here’s a deeper dive into creating the perfect baste for different types of meats:
Pork
Pork benefits from bastes that balance sweetness and acidity, which helps to cut through the richness of the meat. A more complex baste can be made by combining apple cider vinegar, brown sugar, Worcestershire sauce, a dash of mustard, and a blend of your favorite spices like paprika and black pepper. This baste not only adds flavor but also tenderizes the meat, thanks to the acidity.
Beef
Beef’s bold flavors can stand up to robust bastes. A red wine baste brings depth and complexity, ideal for beef cuts. Simmer red wine, beef broth, a sprig of rosemary, minced garlic, and a tablespoon of balsamic vinegar until it reduces slightly, thickening into a rich basting liquid. This baste not only flavors the beef but also adds a glossy, appealing finish.
Chicken
To infuse chicken with moisture and flavor, a citrus and herb baste works wonders. Combine olive oil, the juice of one lemon, orange zest, minced garlic, and finely chopped herbs like thyme and oregano. The citrus tenderizes the meat while the herbs offer freshness, creating a light but flavorful baste that’s perfect for chicken.
Fish
Fish requires a delicate touch. A simple baste that won’t overpower its natural flavors involves melted unsalted butter, lemon juice, chopped dill, and a hint of garlic. Brushing this mixture on fish as it grills adds moisture and a subtle hint of flavor, enhancing rather than masking the fish’s natural taste.
Advanced Basting Techniques
- Layering Flavors: Apply different bastes at various stages of cooking to build complexity. Start with a more neutral, oil-based baste for initial moisture, then switch to your flavor-rich baste as the meat cooks. Finish with a final glaze in the last minutes to achieve a glossy, flavorful crust.
- Baste and Cover: After applying a layer of baste, covering the grill for a minute can help the flavors to penetrate more deeply into the meat, as the cover creates a mini-oven environment. This technique is especially useful for thicker cuts that benefit from a bit of steam cooking.
- Using a Marinade as a Baste: If you’ve marinated your meat, boiling the leftover marinade for several minutes can transform it into a safe and flavorful baste. This not only reduces waste but also ensures that the flavors of the marinade and baste are perfectly matched.
Basting is a dynamic technique that serves multiple purposes during the BBQ process. It adds moisture, builds flavor, and contributes to the visual appeal of the finished dish. By selecting the right baste for your meat and applying it with care, you can elevate your BBQ from simply cooked meats to culinary masterpieces. Remember, the key to great basting is not just the ingredients you use but also the timing and technique of application. With practice and patience, your basting skills will bring out the best in your barbecue creations.
Rest: The Key to Perfectly Juicy Meat
When cooking a BBQ the rest period is an often-underestimated step in the BBQ process, yet it’s critical for ensuring your meat is juicy and flavorful. When meat cooks, the fibers contract, pushing the juices toward the center. Resting allows these juices to redistribute and reabsorb throughout the meat, ensuring each bite is moist and delicious.
How to Rest Meat Properly
- Timing: The ideal rest time varies depending on the size of the meat. Small cuts, like steaks and chicken breasts, should rest for 5-10 minutes. Larger cuts, such as briskets and whole chickens, benefit from 20 minutes or more. Very large roasts and turkeys can rest for up to 30-40 minutes.
- Method: Transfer the meat to a warm plate or cutting board. Loosely tent it with aluminum foil to keep it warm without trapping too much steam, which could cause the surface to become soggy.
- Environment: Rest meat in a warm area away from drafts. The top of the stove or a slightly warmed oven (turned off) can be ideal spots.
The Science Behind Resting
Resting allows the temperature of the meat to equalize, ensuring that the reabsorbed juices are evenly distributed. This process also continues the cooking slightly, a phenomenon known as carryover cooking, which can raise the internal temperature by 5°F to 10°F. This should be considered when checking for doneness before resting.
Serve: Presentation & Enjoyment
When cooking a BBQ, the way you serve it can enhance the dining experience, turning a meal into a memorable event. Here are tips to present and serve your BBQ masterfully:
Cutting Techniques
- Against the Grain: Always slice meat against the grain to shorten the muscle fibers, making each piece more tender and easier to chew.
- Thickness: The thickness of your slices can affect both the texture and appearance. Thicker slices work well for tender meats like brisket, while thinner slices may be better for chewier cuts.
Presentation
- Platters: Use large platters to present your meat, allowing you to arrange it attractively. Consider garnishing with fresh herbs, lemon slices, or edible flowers for a pop of color.
- Sides and Sauces: Serve with sides that complement the flavors of your BBQ. Offer a variety of sauces on the side, allowing guests to customize their plates.
Serving Tips
- Warm Plates: Serve food on warmed plates to keep everything at the right temperature.
- Interactive Serving: Consider serving BBQ family-style or with a build-your-own approach for sandwiches or tacos. This encourages guests to interact and customize their meals to their tastes.
Resting and serving are crucial final steps in the BBQ process, enhancing both the quality and enjoyment of your meal. Proper resting ensures that your meat is juicy and flavorful, while thoughtful serving turns your BBQ into an experience that delights all the senses. With these tips, you’re not just making a meal; you’re creating an occasion that your guests will remember.
Discover Our Menu
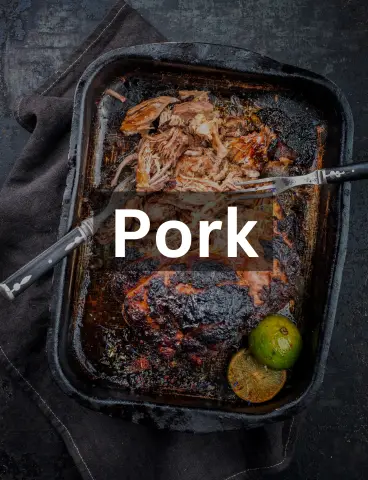
Pork Recipes
Elevate every meal to a culinary masterpiece with our exquisite collection of pork recipes
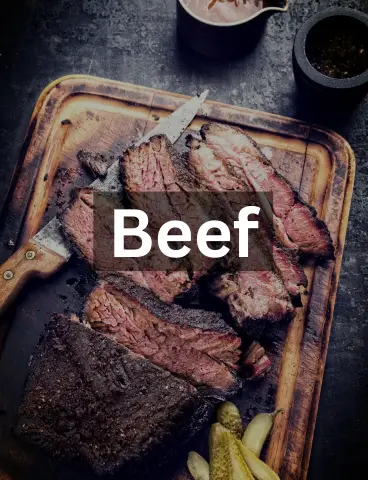
Beef Recipes
Satisfy your cravings and elevate your dining experience with our handpicked beef recipes
Chicken Recipes
Delight your taste buds and ignite your cooking passion with our mouthwatering chicken recipes


